How to composite a 3D model onto a photograph
(and get away with it)
Part 2 - Rendering and compositing
RENDERING
After
taking a closer look at our background photo I saw it's not very sharp, like
it's out of focus. That's actually good since we can render the planes at lower
resolution and save some rendering time. We will scale the rendered image up to
photo's resolution which'll give it compressed look like it came out from
camera. I like to do it that way even when photo is in focus, because even then
you can see some compression and blur at higher zoom levels, and perfectly clean
render is something we'd like to avoid.
So,
set the render resolution to 66% (2/3 of original size). Sample count at 500
samples should be enough (we'll add noise later anyway), and set bounce count
as in the image which'll speed up the render even further. Higher bounce count
is more important in interior shots. Lastly, set ground plane to be invisible
to camera. We only need it to bounce light to airplanes.
Hit
render, and go stretch your legs a bit... ;-) When it's over, save it as PNG,
check RGBA for transparency, 16 bits for more color information (when adjusting
brightness) and leave compression at 15%. Here's my result:
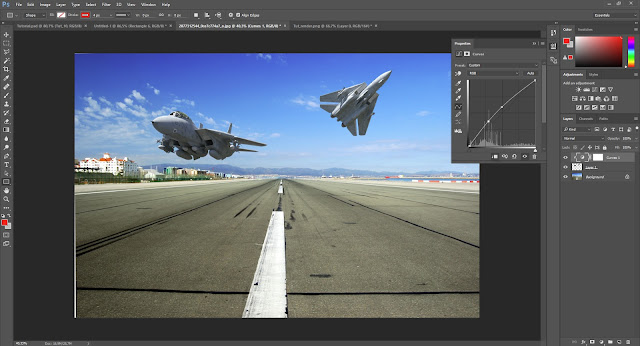
Quick
test revealed that the airplanes are a bit underexposed, but a slight curves
tweak makes it better. Now we're going to add shadow underneath the airplanes.
Back in Blender make ground plane visible to camera again but this time hide
the airplanes. We don't need them to render anymore but we need their shadows.
Change ground plane's material to pure diffuse and completely white, and hit
render again. Stretch legs...
NOTE: This particular airplane model
consists of many, many parts. Making each and every one invisible to camera
would take too long, so I used render region to render only bottom part of the scene
with the ground plane.
The result:
Looking
good. There's a slight bluish hue from sky color in the shadows which should be
OK and white parts are white enough not to cause problems when multiplying
over a photo. Again, save as PNG, RGBA, 16 bit color depth and 15% compression.
We're off to compositing. I use Photoshop but you should be able to follow in
GIMP as well.
COMPOSITING
Congratulations,
you've made it this far. Now let's finish our scene. Load render and shadow
images into Photoshop/Gimp. Remember, we have rendered both images at 66% of
needed resolution, so scale them back up to match the resolution of the photo.
Put „shadow“ image above the „airplanes“ image and use Multiply as a blending
mode. The shadow looked a bit weak, so I duplicated shadow layer still in
multiply mode and lowered the opacity to 45%.
Looking
good so far. Now duplicate airplanes layer (to save the original, just in case - I
like to keep steps as I go in separate layers) and apply slight gaussian blur
to match our photo a bit more. I used value of 0.3 pixels. Then, use Sharpen
-> Unsharp Mask. I used value of 180%. That should mimic camera's
compression. Experiment with values in your scene to achieve desired result.
Not
bad, but it looks like the airplane needs more contrast to match contrast of
that building. I have used another adjustment layer with levels. The effect is
subtle but looks closer to photo. Another thing which bugs me is that the airplane
shadows look too small and too up front, while I feel they should be bigger and more
behind the airplanes, so I moved shadow layer slightly up and I'm more satisfied
with the result. Now it really looks like they're flying low.
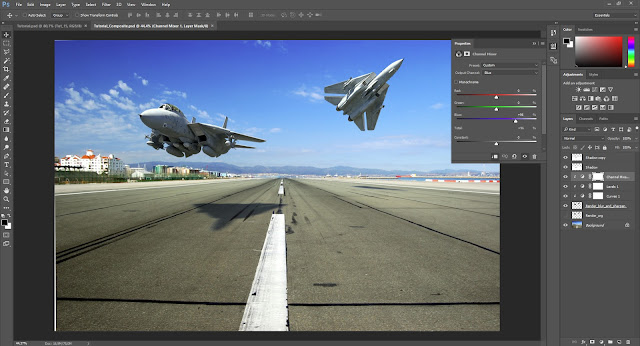
As
for matching the colors, it looks quite good as it is. I've only lowered blue
channel of airplanes layer to 96% via adjustment layer, but we've could've
gotten away without that step. Still, planes have more gray tint now to match
reflected color of the ground.
Again, subtle
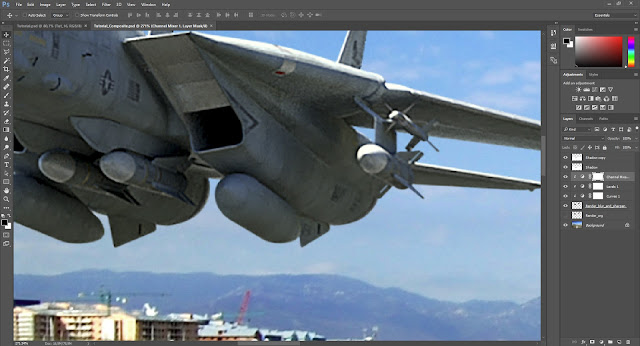
effect but it adds to overall realism of the scene. Speaking of which, every
photo has noise. Some more, some less and is unavoidable. This photo has very
little because most of it is well lit, but still there's a fine grain visible
in the sky and mountains. If you zoom in to closer airplane you can see we already
have enough noise and is subtle enough and I'm actually happy as it is.
So
the next step isn't really needed in this case, but I'll show you anyway so you
know how to do it. Before I would just duplicate subject layer and add few
percents of noise in Photoshop. But the problem with this simple step is that
this added noise is pretty small, colored and doesn't always match the photo
you're compositing into. Good thing there's a solution for almost anything.
Since we already
got noise on our airplanes when applying blur and sharpen, I'll be using
original render layer just so you can see the difference.
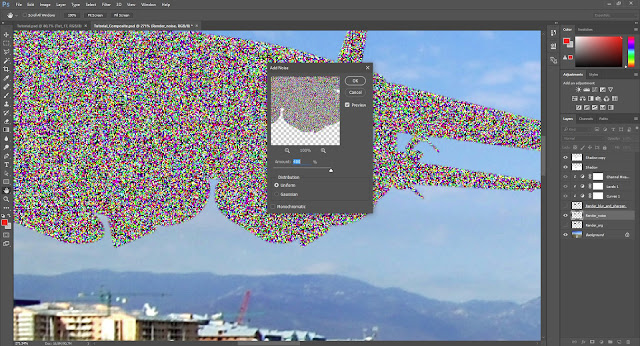
First, duplicate
airplanes layer and then go to Filter – Noise – Add noise and enter maximum
amount, in Photoshop it's 400%.
Now,
give it a bit blur, lower the saturation and set blending mode to overlay. The
noise won't be sharp anymore, color is not needed here and blending mode will
make noise more visible in dark areas and less visible in bright spots, just as
it should be. Finally, lower the opacity of the layer enough so the noise looks
similar to that on the photo. This is my result:
And
that's about it. We've covered most important stuff, but if you want to take it
one step further you can add all kind of effects, props, matte stuff... Your imagination
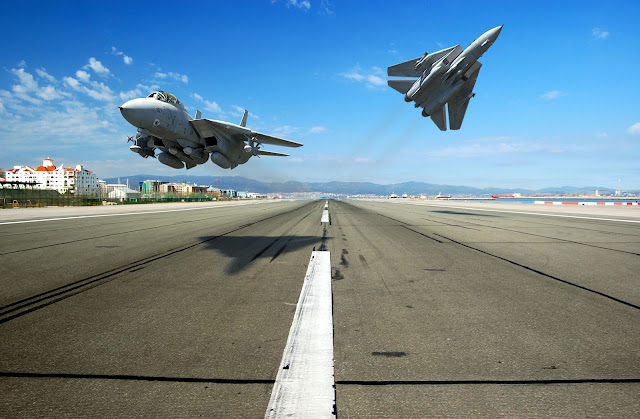
is your limit. On my final composite I have added exhaust trails (painted with
brush, blurred and lowered opacity), heat haze (filters – spatter, soft edges
on selection) and gave some directional blur to the airplane that's breaking off formation.
FINAL RESULT
I
hope this tutorial gave you some info on how to do composites. Although I
showed you how to do it in Blender and Photoshop, principles apply to any 3D
modelling app and photo editor you usually use. Cheers and thx for sticking
this long... :-D




No comments:
Post a Comment